box slider
 fullwidth slider
Troubleshooting a dead AMD Ryzen 9 X3D Processor
- Home
- Solution
- Technology Consulting
- Troubleshooting a dead AMD Ryzen 9 X3D Processor
In the 25+ Years I have been working in Tech, responsible for many PCs and Servers, having built hundreds and repaired thousands, I had never had a CPU die on me…even when I lived back home in the Dominican Republic where the electrical grid was unstable. I can only remember one incident where a brand new Dell PowerEdge R520 had a dual Intel Xeon CPU E5-2470 v2 configuration, and one of the the processors died within 3 months of powering it up.
My latest build (Dec, 2024) includes the following line up – which by the way, the majority of these components were gifted, some passed on to me due to upgrades:
- CPU: AMD Ryzen 9 7950X3D
- Motherboard: ASRock B650M Pro RS WiFi
- Graphics Card: NVIDIA GeForce RTX 4060
- Memory: Crucial Pro 32 GB DDR5 CP2K16G56C46U5 (2 x 16 GB)
- Power Supply: Corsair RM850x
- Drive 1: M2 Crucial P3 Plus 4TB
- Drive 2: M2 Crucial P3 Plus 4TB

What Happened
Similar to what I found in many forums, I was not overclocking, gaming, stress testing or bench-marking when all of my monitors went dark. I was browsing the Internet with 2-3 other applications open. When trying to turn the computer back on, it would do so for about a second, the fans would spin, the LEDs came on and then it would shut down again. When powered off and the power supply connected, the B650M Pro RS WiFi motherboard has an RGB LED, which indicates some life…and right below, you have the Post Status Checker LEDs which indicate any problems and can point you in the right direction so you can look at the CPU, memory, VGA or storage devices. In my case, both the CPU and DRAM LEDs would turn on for a second and then power off with the rest of the system.
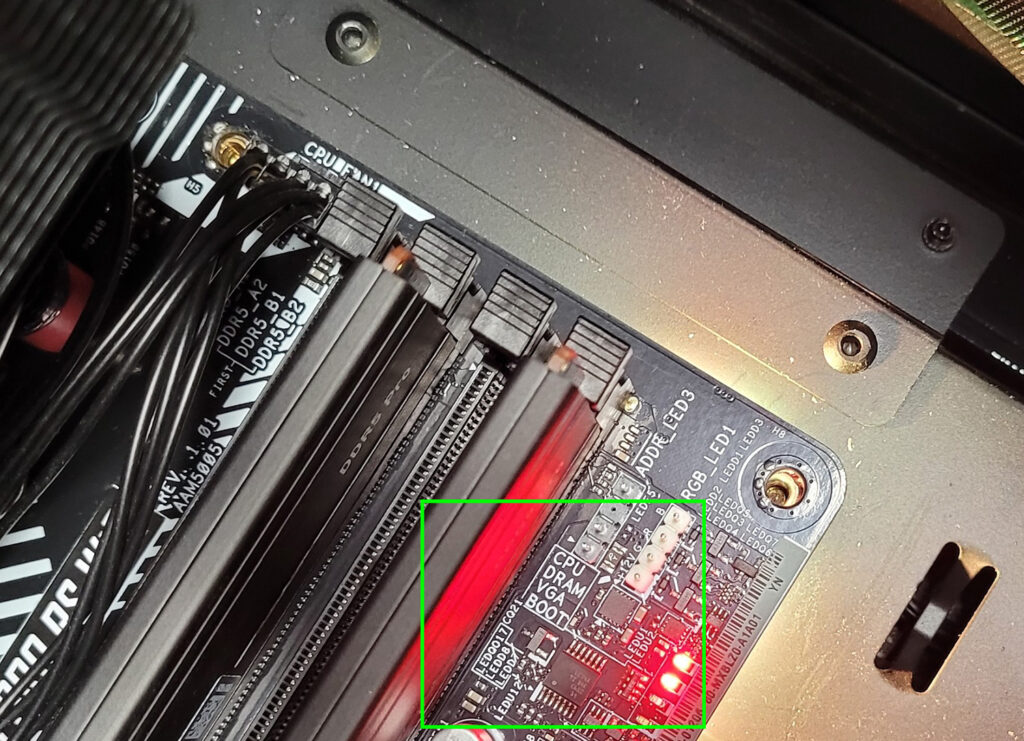
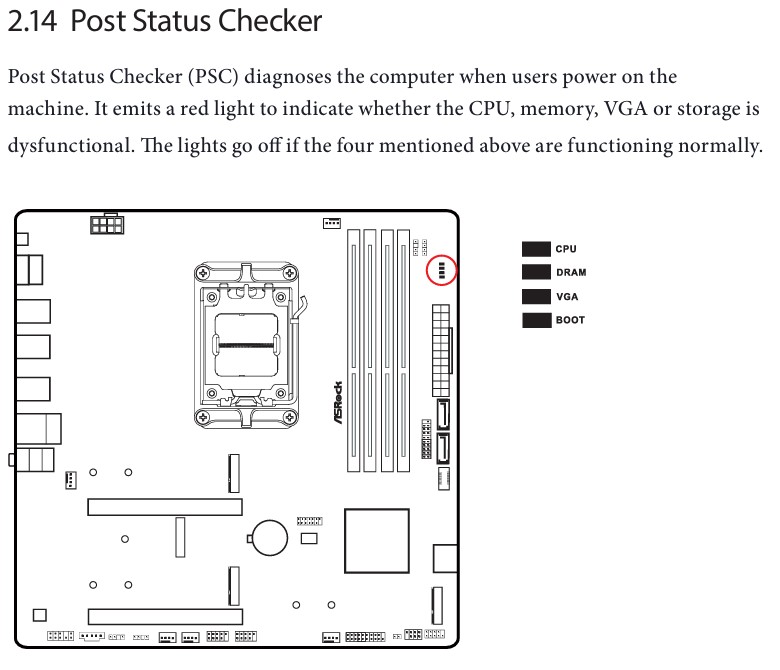
Always refer to your Motherboard’s Manual when referencing Status LEDs – mine can be completely different from yours.
Let’s Troubleshoot
Unlike the late 90s, early 2000s and all the way to the mid 2010s, Motherboards had very little fail-safe mechanisms where they would protect itself if the memory, CPU or anything else was misbehaving. In the past, I was able to remove CPUs, memory, the video card, and many other components and the PC would continue with power – so usually, when something is powering down after 1 second, it is either 1) A short/false contact somewhere 2) Power Supply failure 3) CPU Overheating
Power Supply
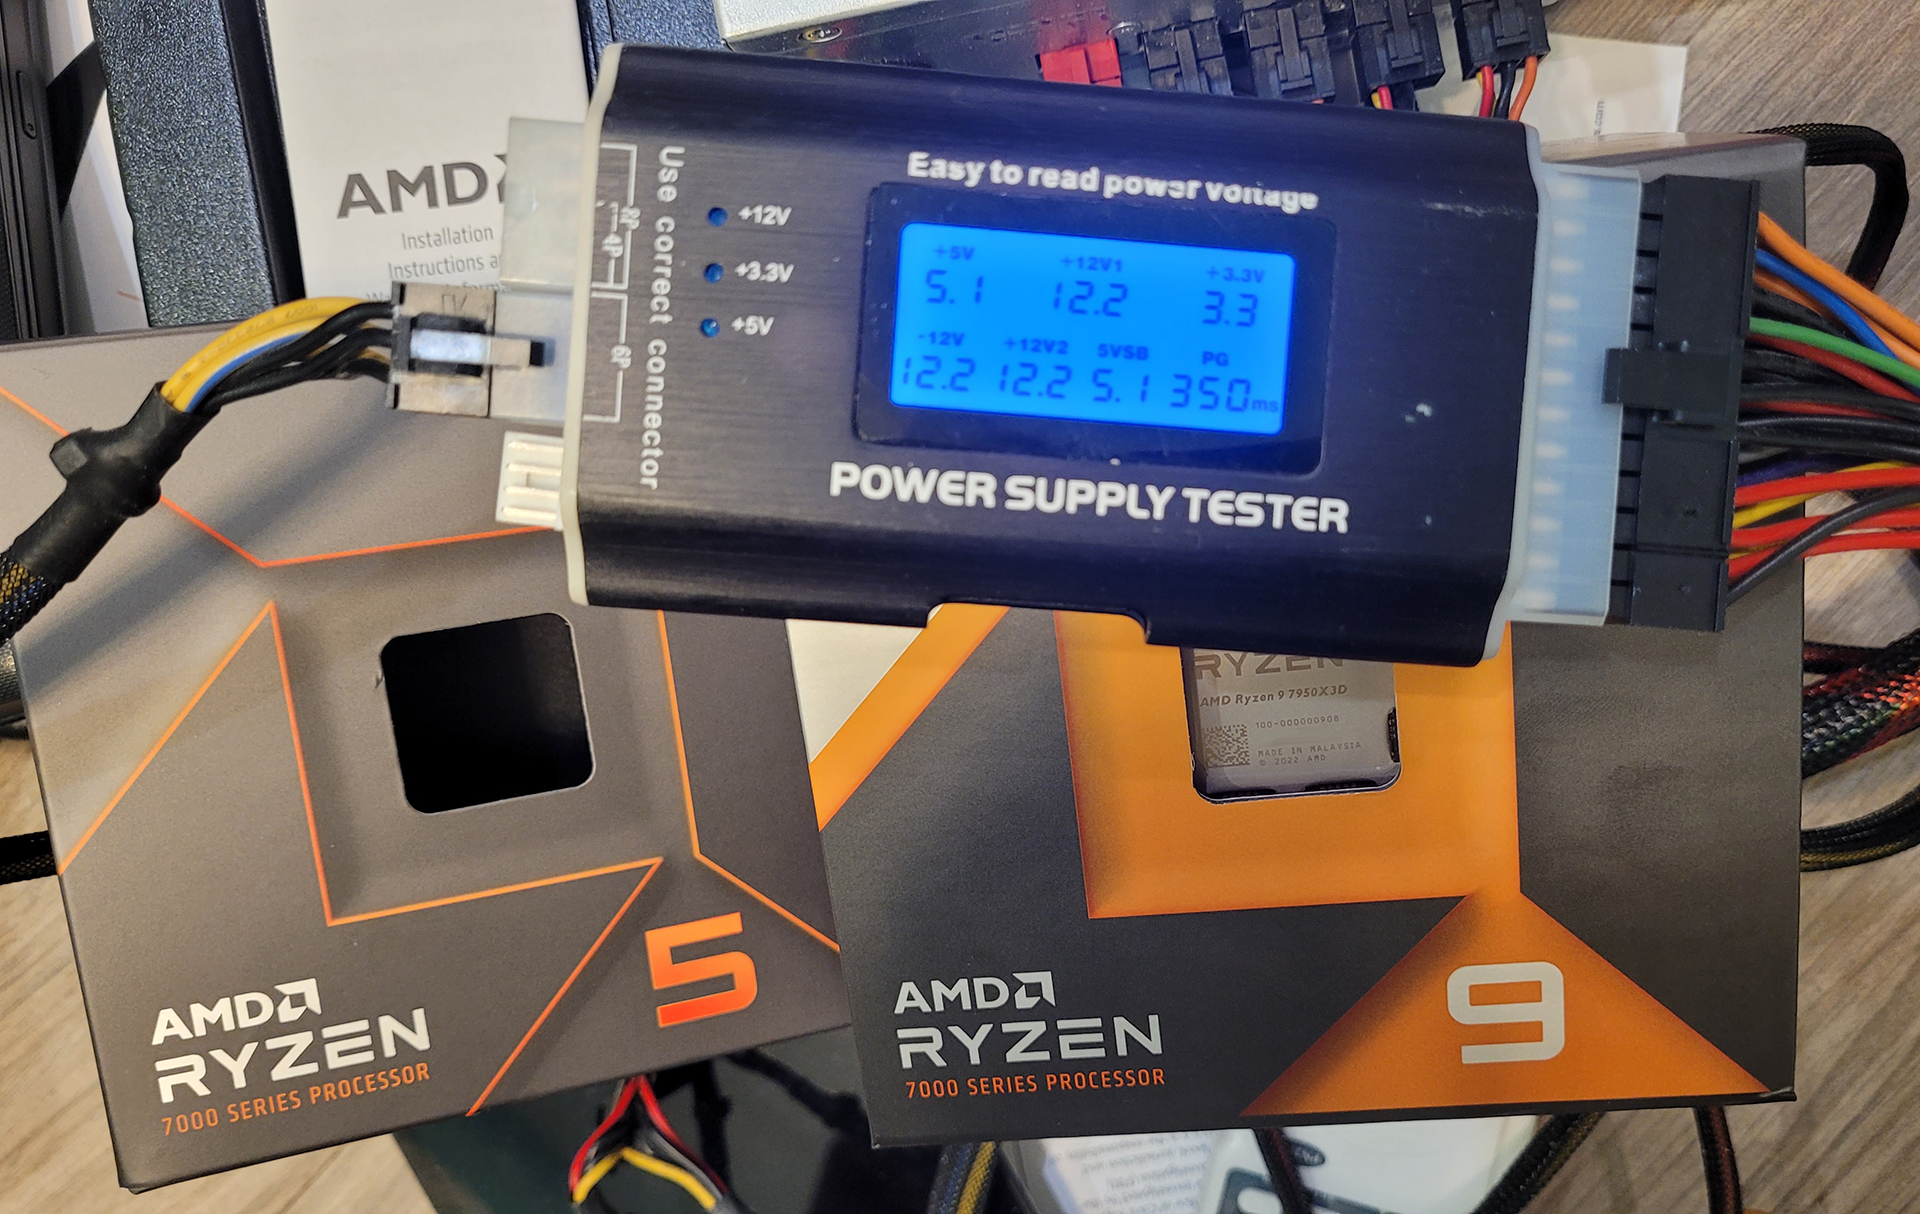
I go beyond the standard paper clip trick (jump the green and a black wire to turn on) and use a Power Supply Tester I’ve had for over a decade. It is a Rexus PST-3 Digital Power Supply Tester with LCD, and if it looks beat-up in this picture, it’s because I’ve been using it since 2007, and it has tested thousands of power supplies. Unfortunately I think it is now discontinued and is Out of Stock at Newegg.com – However they are similar available on Amazon.
These tools are useful because unlike jumping the wires, the tester turns on the PSU and displays all of the voltages supplied. You have to be careful – idle or no load, is never a good way to test a PSU, however, seeing these values with no load is useful, as you want to make sure they are always above instead of below. Voltages drop a bit after you add a load (Motherboard, CPU, fans, etc), so if below we saw the +12V1 at 11.7 or the +5V at 4.5 – I would be extremely concerned about this PSU and consider replacing it. The values we see below are on this Corsair RM850x are exactly where we want them to be.
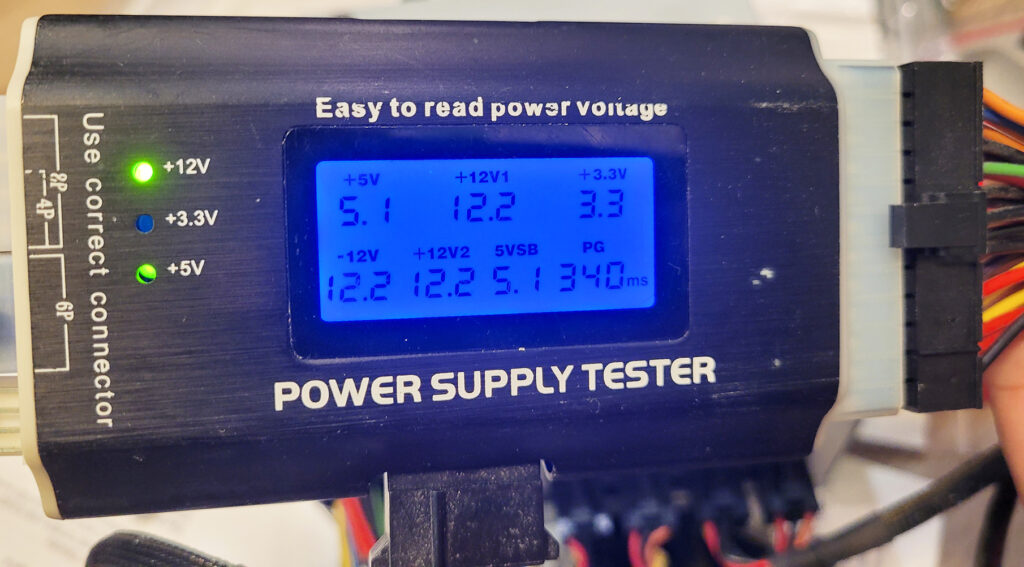
You can also test the Power Supply on a different system, or bring in a different power supply to test your current setup that is failing. So to re-cap:
- Test the PSU with a Power Supply tester and make sure the voltages are adequate
- Test the failing PCs PSU on another system
- Test the failing PC with another PSU
This will immediately rule out the Power Supply – and in my case, the Corsair RM850x passed all tests.
Motherboard
The 1st and most crucial step here is to remove EVERY component that is not critical for the Motherboard to get to the BIOS screen. So remove all Hard drives, SSDs, USB/Audio and any external connections (except Monitor/Video) – In some cases I go as far as to remove all Case fans and any internal connectors (USB/Audio, Power LED pin, HD Pin, Power SW, Internal Speaker, etc.) The less the Motherboard has to work, and the less connections going to it, the better. Always consider electrostatic discharge (ESD) when working with these components and take the proper steps to prevent damaging your components by mistake.
The 1st clue that the Motherboard is alive are the LEDs that light up as soon as the Power Supply is connected or switched on. In my case, the ASRock B650M Pro RS WiFi has an RGB LED underneath that creates an ambient light.
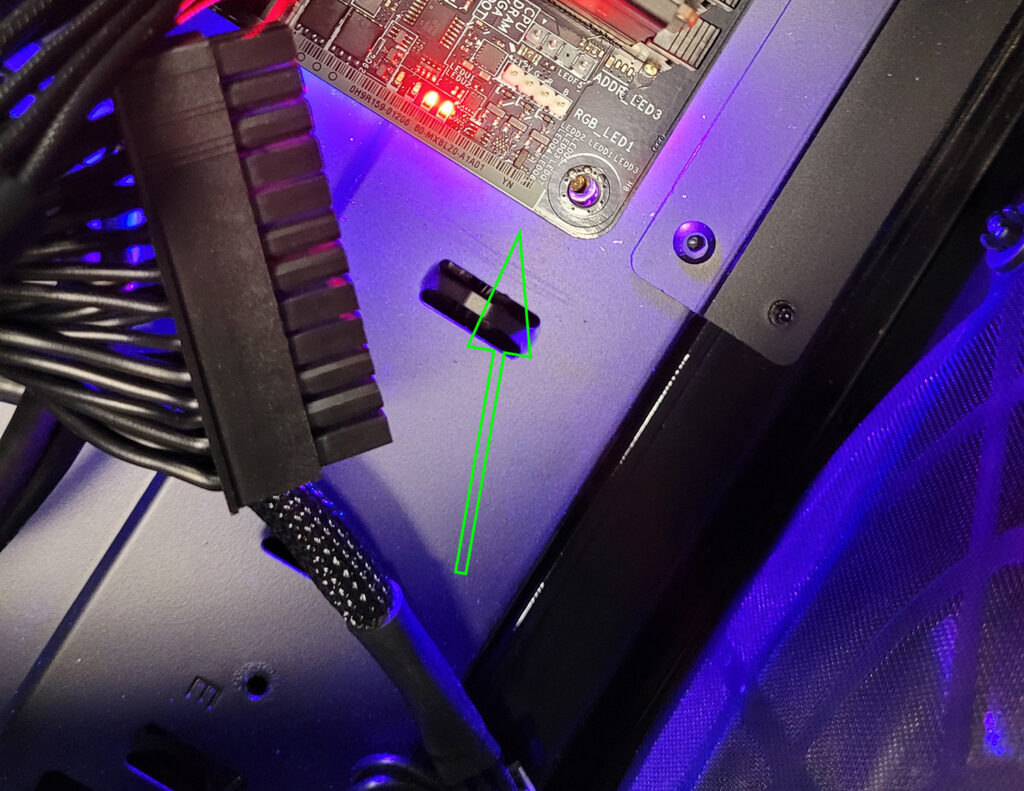
A good idea is to review the Manual’s Troubleshooting procedures or check the FAQs, because with so many different manufacturers, firmware versions, BIOS/CMOS/UEFI versions, revisions and variations, every single one will behave differently when it’s failing. So in that section, you may find a paragraph that tells you exactly what is going on and where to start. So here were my steps:
- Review the Manual – Understand and Identify clearly what your Motherboard is telling you:
a) I see and feel the Power Supply – My LEDs are lit up
b) My Post Checker LEDs point to the CPU and DRAM – Check them - Reset the Motherboard’s CMOS/BIOS – This will clear out any settings, and in some cases bugs that are triggered by specific settings. Also, if you have been Overclocking, make sure to read any options your Motherboard may have to reset back to default settings. If the problem is compatibility or a known bug, look for a feature such as the BIOS Flashback Button that allows you to recover or Update the BIOS in case of a failure. Make sure to unplug the power cable and press the power button for a few seconds to drain all power before you reset the BIOS/UEFI.
- Remove/Reinstall or Re-Seat the motherboard – All the heating and cooling inside the case makes the components move. In many cases, I have seen motherboards incorrectly installed, and then eventually, shift/move, and some parts end up touching part of the case, which can be identified as a ground fault or short-circuit. To quickly verify this is not the case, I usually remove the Motherboard screws and place it on top of a cardboard box (still connected to the power supply). This confirms 100% that the motherboard is not touching metal…anywhere. If you have a 2nd Power Supply handy, this is also a good time to test it and make sure your AC Outlet is properly grounded and wired – many people forget to check this.
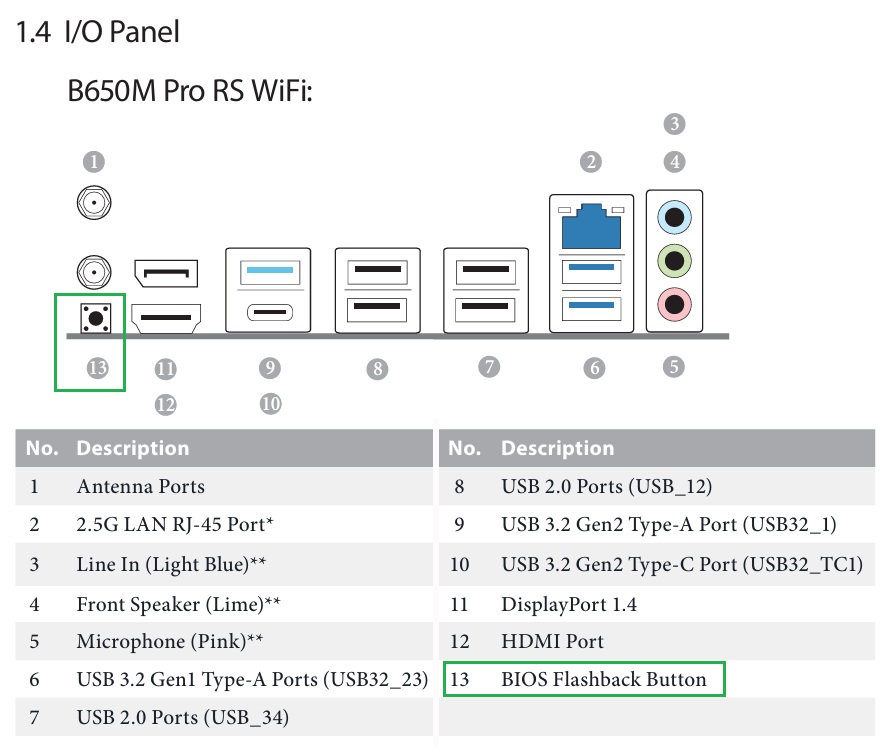
Although you can do certain things to rule out the Motherboard, unless you have advanced knowledge and equipment in Electronics, it’s very difficult to completely test and rule out the Motherboard because of it’s many components…however…we can swap out most of the components and come to a theory. I was not able to come to a conclusion just yet until I completed the remaining items below:
Memory
When a Motherboard is not powering up, the only way to completely test the memory is to install the chips on a different PC, and perform a full test with a tool such as Memtest86. For this situation:
- Remove the chips and analyze each one for any visible defects.
- Test each chip individually in the different slots and see if the computer will power up
- Try powering on the PC with no memory – Although rare, in several occasions I have seen damaged pins on memory chips cause a short. Typically, if no memory is installed, PCs will still power on and if an internal speaker is installed, you will hear it beep a sequence.
Tried all of the above – I still had a feeling it was something else.
The Culprit – AMDs X3D CPUs dying on AM5 Motherboards
Honestly, this is extremely alarming – Read here and here, and here – And we need to stop there. I found infinite sources of this problem, and the worst part is, MANY OF YOU, including me, bought an AMD Processor because we were terrified of the problem affecting Intel CPUs.
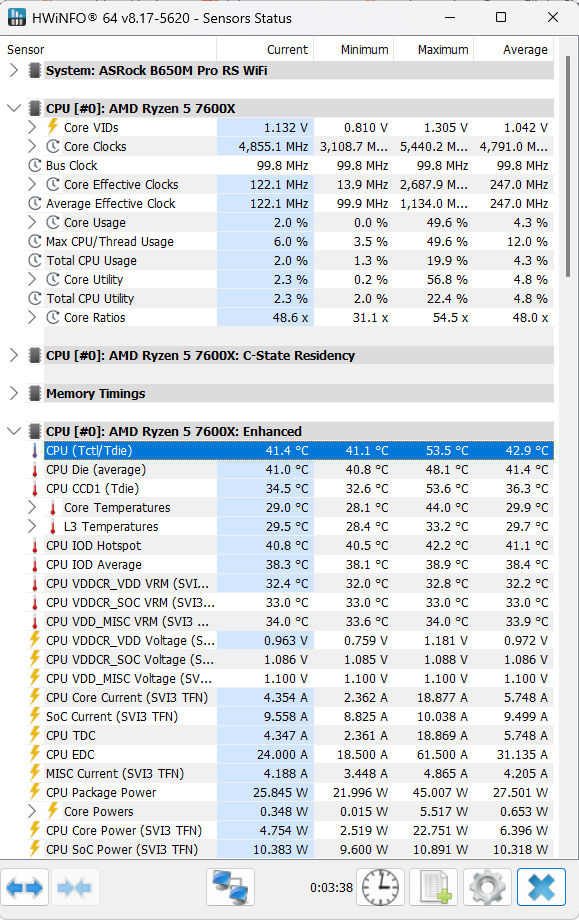
After Troubleshooting all of the above, you land on one conclusion – There is no real way to test a CPU or a Motherboard conclusively with simple tools, unless you have another CPU and a Motherboard. So I ordered the cheapest CPU I could find with the fastest delivery, which was a AMD Ryzen 5 7600X. In the meantime:
- Remove the CPU from the Slot – clean off the thermal paste and analyze the chip for any discoloration or bulging. In many of the AMD incidents (including mine), not many have changed it’s appearance. Mine still looked brand new (see pics below).
- Re-Seat the CPU – This was actually been the solution for some – some pins may just not align properly after the CPU Heatsink is bolted down.
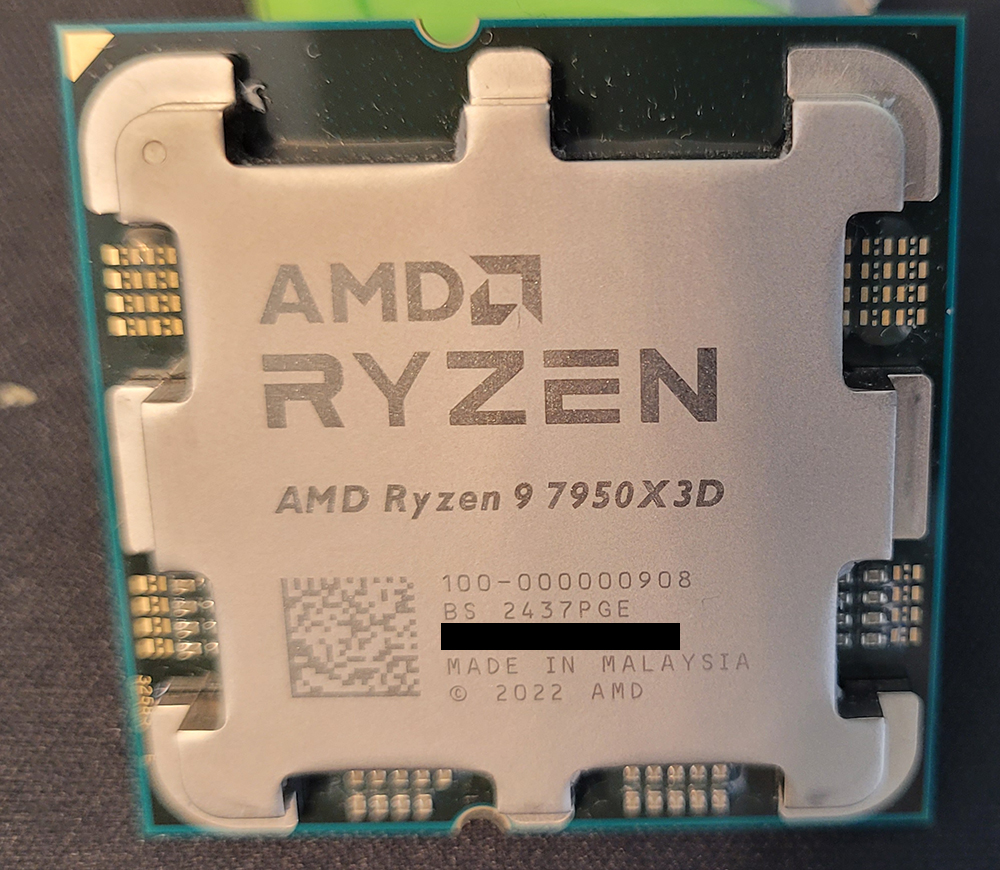
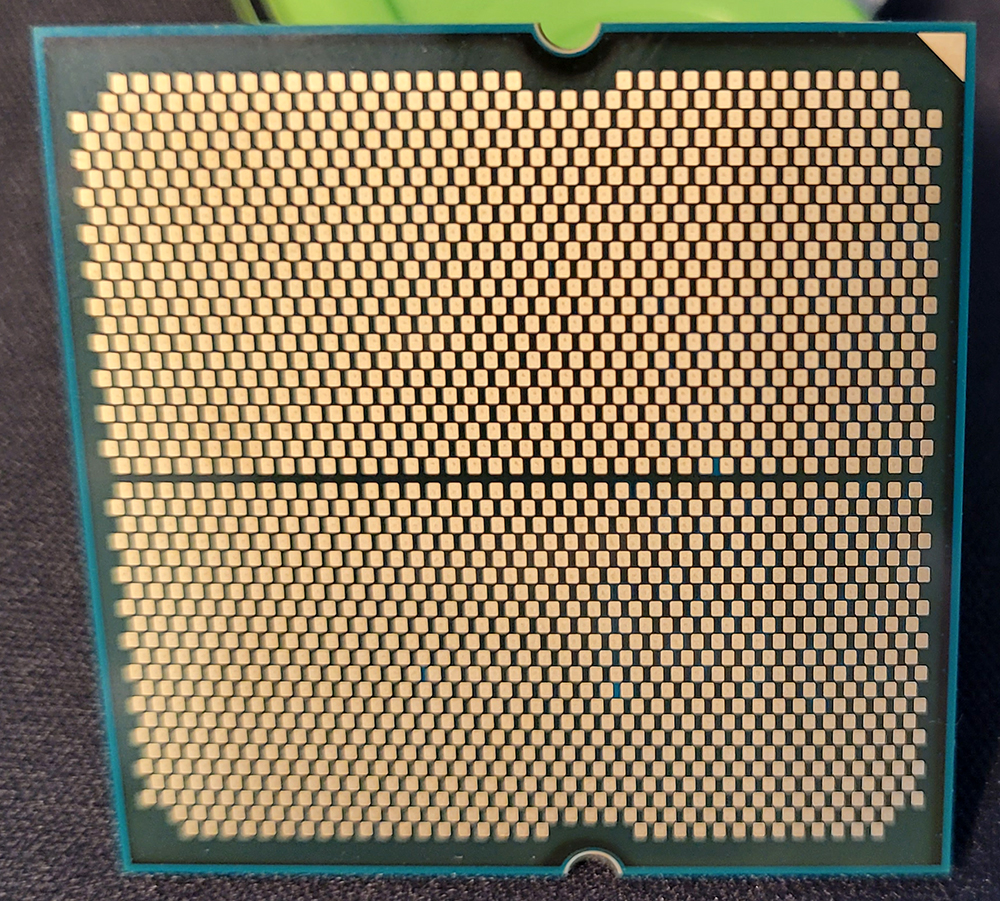
Unfortunately none of the above worked for me. My new Ryzen 5 7600X arrived – I tossed it in, and after a quick memory re-training (Very important! please read about this) my ASRock logo showed up, and the PC booted right up. This created two firsts for me: 1) A desktop CPU dying 2) Having to keep a backup CPU around. Next step was to file an RAM with AMD since the CPU was still within the 3-year warranty period.
Further Recommendations
- Immediately file an RMA if you purchased your processor within a few years (may vary per Processor and purchase type – OEM, Kit, Box, etc). You will need your proof or purchase, OBN and Serial Numbers, details of your PC/Build, and picture of the CPU itself. AMD even asked me for the original purchase confirmation emails from the store in .eml file.
AMD Warranty
Intel Warranty - If you have a fully functional PC, you may have to break the rule “If it’s not broke, don’t fix it” and download any Firmware and BIOS/UEFI updates available for your motherboard which references this problem.
- If you managed to get your PC up and running by purchasing a new temporary processor while you file an RMA, update your BIOS and lookup any recommendations or articles for ALL of your components (RAM, Motherboard, CPU, Power Supply, etc)
- Always protect your PCs with a proper UPS Battery Backup; Sine wave UPSs are recommended.
- Check your electrical outlet – I can’t stress this enough. Check both the voltage and the wiring with a Power Meter and an electrical outlet tester – This is literally one of my standard tests for any equipment I install before I can guarantee any type of warranty.
- Perform a benchmark or stress test on your PC once in a while. I do it at least once a year and this is useful because:
a) In new PCs, it will confirm that all components can expect to work properly under stress, which includes fast writing to the hard drive, throttling the CPU to 100%, filling up the memory and making sure no components oveheat.
b) For older PCs, if a component is failing, this can help you bring the problem up to the surface before the warranty expires.
The applications of choice are: HeavyLoad, PerformanceTest, and Prime95 - Go into your BIOS/UEFI or use an application to check your temps, voltages and Fan RPM regularly. You don’t have to become obsessed with this, but irregular voltages and high temps are the silent killers of computer equipment. A great application for this is HWiNFO