BIOS/UEFI and Firmware Updates – Best Practices
- Home
- Solution
- Technology Consulting
- BIOS/UEFI and Firmware Updates – Best Practices

This…is Important…
Any Hardware device, whether it’s a camera (CCTV, Digital..etc.), a printer/copier, hard drive/SSD, mouse/keyboard, headphone/headset, motherboard, VoIP or cellphone, Arduino or Raspberry Pi, has a built in memory or storage chip housing software specifically made to communicate with the Device’s hardware. This is called the BIOS (sometimes referred to as CMOS), UEFI, or Firmware…and, if erased or corrupted, it would be impossible to use your device. Once a device is manufactured and leaves the factory, this software is embedded, in some cases it cannot be modified, but in most cases, as the product is used in different environments, reasons come up to update the BIOS, some considered extremely critical – so manufacturers use programmable Chips that allow for the software to be re-written or updated. This article exists because even though manufacturers take the best precautions to release instructions and utilities to safely update your BIOS/Firmware, failures can still happen, and consumers lose millions of dollars every year with these failed updates. So please take the time to carefully review this article before performing any updates, or just in general to understand the best practices, review some tips and tricks, and understand the risks and the recovery methods when it comes to working with the BIOS, UEFI, or Firmware.
Some Examples of why BIOS and Firmware updates are performed
- To fix a bug: A printer is released with Firmware version 6.23.5 – which randomly gets a blank screen after printing a very large PDF file. Firmware version 6.23.6 is released to fix the problem.
- To prevent obsolescence: A motherboard released with BIOS version B09 will not detect Hard Drives bigger than 2 Terabytes. B10 is released to add support/compatibility for detecting the larger drives.
- To patch vulnerabilities: A WiFi security camera is released with firmware v1.0.6.0 and automatically enables a network protocol such as Telnet with default credentials, which exposes the camera online.
- To add features and options: A Firmware update for a DSLR Camera now allows pairing with Android Devices; a BIOS update for a motherboard directed at Gamers, now allows you to save overclocking performance profiles for the processor and RAM – making it easier to revert if the system becomes unstable.
- To disable or remove features: Some printer manufactures have released firmware to help the printer detect generic or non-brand ink/toners and block the printing feature, supposedly to prevent damage to the printer. They have also released firmware updates to disable outdated network protocols or printing features, such as SMB 1.0.
- For fun and research: There are many individual users and also companies that have built Firmware with general public Licenses, allowing for software developers to publish their own modifications and creations. Two great examples are OpenWrt and Asuswrt-Merlin – which resurrected older residential devices with many features, and also enhanced newer devices. In the Flight Simulator community, MobiFlight takes an Arduino, such as the Mega 2560, and flashes the Firmware so that it can natively communicate with Flight Simulation software such as FSX, Prepar3D, Flight Simulator and X-Plane, and also with electronic devices such as switches, pushbuttons and Encoders.

The Dangers of performing BIOS/UEFI and Firmware updates
When I got my first computer in the late 90s, the dominating motherboard brand in the province of La Romana in the Dominican Republic was PCChips. Although flexible, these motherboards lacked support for many products, so many BIOS updates were released. The problem was…there were many variations…you had the M748LMRT, the M748MR, the M748LM…etc, and on top of that, these boards had different versions, so downloading the correct model and version for you motherboard was tricky. If you flashed it with the wrong BIOS, you immediately killed the motherboard and support was non-existent. With that said, it is no surprise why when I was a junior technician, dead PCChips motherboards ended up at my house from all over town. So…incorrect, corrupt, disrupted or incomplete BIOS/Firmware flashes can cause the following:
- Your device will no longer power up: Once you restart the device after the update, it may not respond to pressing the power button at all, if it does, the screen will stay completely black, and this is as much as you are going to get. You could try removing the batteries or power and attempt a power drain, but it will go right back to being unresponsive or a black screen.
- Your device gets stuck in an infinite Loop: It will power up, do a self-check, then politely let you know that it cannot find a feature or hardware component and then restart. And then politely let you know again…
- Some features may no longer work: A multi-function printer for example can still be used to print, but the scanning function may completely cease to exist – disappearing from the options screen and the software driver on your computer. Other devices with an SD card slot may refuse to recognize SD Cards or any other type of media.
- Your device may become unstable or unpredictable: I was witness to a BIOS update where after restarting, the computer booted up to the logo screen and froze. It was powered off manually. The logo came up again, disappeared, and the computer suggested you Enter the bios to re-configure dates/times and settings…upon entering, it froze again. From then on, it locked up unpredictably, sometimes at the Logo screen, sometimes as the Operating System was loading.
- Your device may become slower: In several occasions I have seen cellphones, printers, motherboards (boot time), and several other devices become way slower after an update. In some cases, the wrong Firmware caused the device to look for features that were not present, looping a few times before presenting the error of “feature not found” and then proceeding to initialize.
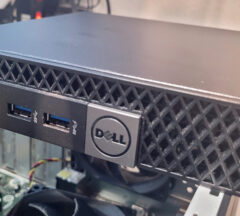
- Your Device may use more power: In my articles of Energy usage research of computer devices, I was able to notice a pattern with Motherboards and devices when the Updates or flashes were incomplete. If you have ever checked out the Dell forums, you will notice that 12th Generation PowerEdge Servers have many updates available to individual components (iDRAC, PERC RAID controller, Broadcom GB LAN, LifeCycle Controller, etc.) You can get these updates in a nice ISO using the Dell Server Update Utility (SUU) or download them individually. In these forums, you will notice an excessive amount of posts addressing failed updates, which now cause the fans to spin faster, the CPUs to overheat and shutdown the system, or the Server to stay in a state where energy saving features are not activated.
- Your Device may become dangerous: Although I have never performed in-depth research on some claims, such as devices overheating and causing fires or exploding, there are quite a few stories out there of Hardware acting strange after an update, then overheating and either destroying itself, or other devices connected to them.
- Your Device will become e-waste: This is a topic that gets very little attention. As somebody who recycles anything and everything that is recyclable, preventing e-waste is part of my process. Considering I take tons of e-waste to facilities every year, I can see the impact it has on the environment. BIOS and Firmware updates contribute massively to e-waste, and I have seen brand new laptops, printers, hard drives, motherboards and many other devices thrown in the trash due to failed updates.
BIOS/Firmware Updates Best Practices
1. Understand the Risk Factor: I don’t care how many success stories you have read or been told about, or the fact that Customer Support has recommended a Firmware/UEFI/BIOS Upgrade – It is up to you to determine if you really need to perform an upgrade, because at the end of the day, there is always a risk of damaging or “bricking” your device. Make a decision and review it; if the update is not critical to your operation, increases security or solves a major problem, then “it’s just nice to have” does not apply here. Move on, avoid the stress and leave the device fully functional. If it is a critical update that will solve a major problem, then move on to Step 2.
2. Prepare your Backup Plan:
– What would happen if the update fails and you lose your device?
– Does the manufacturer provide steps/software to perform a backup which can help recover the BIOS/UEFI/Firmware in case of a failure? If your device helps you access other kinds of data, make sure to backup that Data as well so you have access to it in case of a failure. Examples: HP, Lenovo, AMI, Award, Insyde, Dell, ASUS, MSI – These are only examples. Please confirm with the manufacturer or Manual.
– Does the device have a dual BIOS/UEFI or option to create a backup of the current configuration on itself?
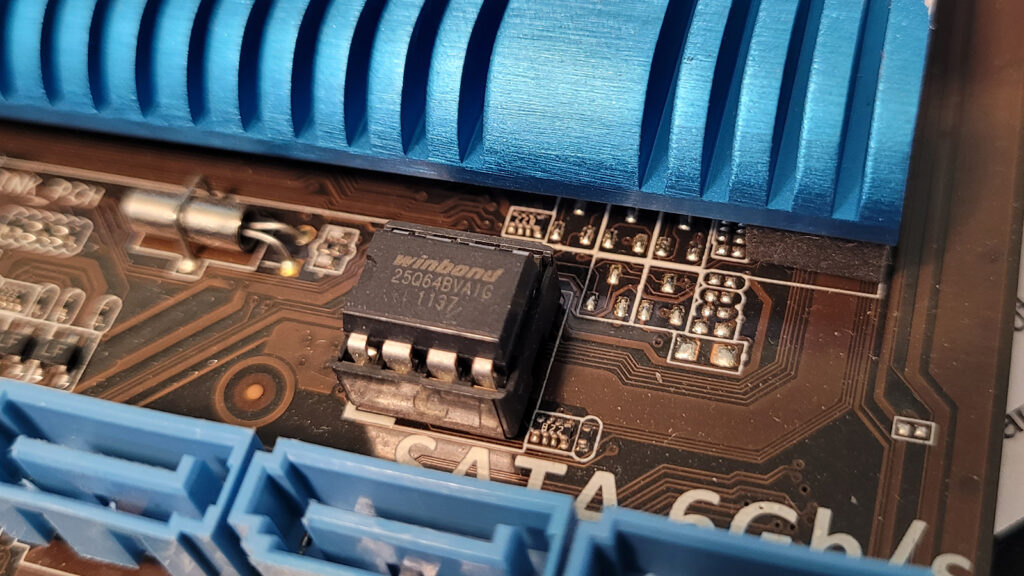
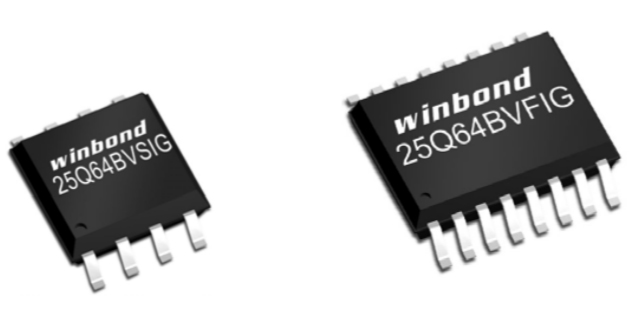
– Is it possible to purchase a replacement BIOS/UEFI Chip or Firmware board for your device?
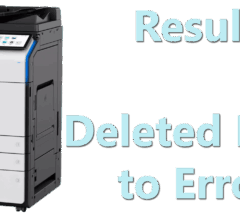
FAQ Example found in Manual for Firmware update of Neptune 4 MAX 3D Printer
"Update failed…" is displayed after following the steps?
a) Some USB 3.0 flash drives may not be read properly. Please use the USB 2.0 flash drive that comes with the machine or replace it with another USB flash drive.
3. Prepare your Execution:
– What do others say about the update you are planning to perform (Reddit, forums, tech support, KB Articles…etc)? – Do they consider the process risky? Never assume their experience will be the same as yours – just use their experience as a guideline (what to expect…etc).
– Is there any documentation online of the entire procedure being performed or documented (YouTube, KB Articles with images etc.)?
– Are there any other things you need to update or fix before the actual firmware update? For example, OS updates, error messages..etc. Make sure the device is in it’s most stable condition before performing the update.
– Take good notes of your current setup. Write down any version names, dates, and as much information as possible. This info will be crucial for any type of recovery, support requests or future updates.
– Run through a simulated (talk it out) BIOS, UEFI or Firmware update. Make sure you have all the items you need, including the proper media for flashing/updating, and the proper equipment to fallback or recover. You really do not want to see yourself waiting for a USB to Floppy/CD/Flash Card adapter or a serial cable for a few days or a week in order to attempt a recovery of the Motherboard or Device.
– Finally, this is not the moment to be multi-tasking. You can easily get distracted and download the wrong file, misinterpret a step in the instructions, or even miss a step completely. Focus only on one thing: The Update itself.
3. Prepare your Environment:
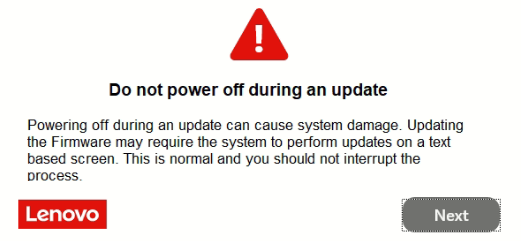
– The Chips you are about to update require electrical power – the most stable you can find. Every single process will remind you that these updates cannot be interrupted, especially by loss of power. Unstable or loss of power is the number one cause of damage to electronics.
– If you are updating a Desktop, Mini PC, Inkjet printer, or any other device with a faulty or missing battery (such as a Laptop), make sure it is connected to a UPS Battery Backup, and also make sure you have tested the unit with at least 50% load on battery power for a few minutes to make sure the batteries themselves are in good condition. Battery backups can be very deceptive if not tested properly – for example, I’ve seen techs test a battery backup for 4-5 seconds and consider it a pass, but then suffer the consequences when power goes out for 2 minutes and the battery backup barely made it to 35 seconds.
– Before the actual update, restart the device, even several times if you have to. In one case I saw another tech restart a computer after updates, to then have his Firmware update interrupted by Windows Updates wanting to restart once again. Close out all applications and stop those running in the background, especially your Antivirus or Security Suite which could trigger a false positive on the update program or any of its files. For printers, copiers, cellphones and similar devices, feel free to power cycle (power off then unplug power), wait 3-5 minutes, and re-connect power. This will restart the device, free up memory and stop any previous incomplete jobs. You can also disconnect the device from the network to make sure new jobs aren’t sent, or any processes monitoring the device interrupt the update.
Sample warning for Dell PERC H710P Firmware Update
3.0 Important Information
=========================
The firmware upgrade may fail if any of the RAID controllers in the system are performing an I/O background task (that is, consistency check, background initialization, rebuild, or reconstruction). Allow the background task to complete before attempting to upgrade the firmware. Patrol Read tasks will not affect a firmware upgrade.
– For devices that are heavily dependent on batteries (cellphones, laptops, tablets, etc.) make sure they are fully charged. Many newer devices will actually prevent you from updating the Firmware if your battery is too low. If any of these devices power off once unplugged from power due to a faulty battery, then plug them into a UPS Battery Backup like mentioned above.
– Have a phone or camera ready so you can document any errors or messages you see on the screen. You never know when you will need to review them.
Executing the UEFI, BIOS or Firmware Update – Here we go…
1. Locate the Readme or Changes file and actually read it: This file is critical and can help prevent a disaster. It can also save time by helping you confirm what the Update will actually do. Many people perform updates and still encounter the same problem or do not see any improvements in performance…this will all be addressed in the Readme which accompanies the update package. Please see the following examples below:
– BIOS Changes.txt Example File
– Neptune 4 Max 3D Printer Firmware Update Readme.txt
– Lenovo BIOS Readme.txt
2. Locate the instructions or Manual and review it carefully: In many cases the instructions are part of the Readme file, but sometimes a separate file is provided with very detailed instructions. Some of these instructions are very specific, and it’s actually dangerous to not follow them word for word.
Example 1: When updating some of the software on Avionics on Citation Jets, they specify FAT16 formatted flash cards, and even go as far as to specify the desired cluster size.
Example 2: On SonicWall’s forums, after a Firmware update, many people reported the Firewalls acting weird after a restart. It was then discovered that some Techs/Engineers had skipped versions. For example, the current Firewall was using 5.9.2.14 and the update performed was to 6.5.4.9. It was specified in the Readme/Instructions to go to a specific version first, and then to the latest update available – skipping these in-between versions caused the problems mentioned in the post. Many manufacturers publish tables which have upgrade paths and point out which is the next version to upgrade to.
These instructions will also walk you through the available methods for an update or downgrade, for example, performing the update within the Operating System, using a separate boot disk, or using a utility within the UEFI/BIOS Screen or a button on the motherboard. A Firmware downgrade is sometimes necessary and is performed to remove a bug introduced in a new update.
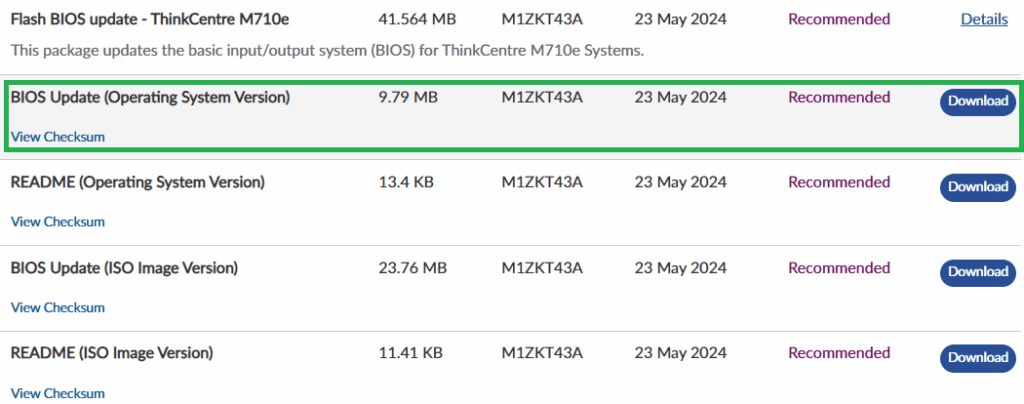
3. Download the Update Package and Verify the download: Visit the support page for your product and proceed to download the update package for the update method you have chosen. In this example, I have chosen to use the Windows Utility, which will provide me with an .exe file I can download and run. From the list of files, I will select the latest one. If you look at the 2nd image below, you will see a View Checksum link. This information is used to compare the online file, with the file you downloaded and make sure that all of the data was transferred properly. A corrupted BIOS/UEFI/Firmware file can cause an incomplete update process and damage your device. Operating System packages and even the UEFI or BIOS itself, most of the time, will verify the downloaded package or ROM file, but it’s a good practice to verify the checksum/hash just to be safe, especially in very expensive devices that have no replacement or support.
Important Note: I do not recommend you create your own method for updating the BIOS. I have seen many try Live CDs (Hiren’s Boot CD, Live11, Ubuntu Live CD, etc) sketchy BIOS files, modifying code, etc. – Please don’t – unless it is your last resort and you have nothing to lose. ONLY use files and methods published by the manufacturer or a certified partner company.
Finally, try your best to avoid performing Firmware updates remotely (RDP, AnyDesk, Teamviewer, VNC, etc). It’s best if you are physically present with the device, interacting with it directly, either with your hands (pressing buttons like on Tablets/Printers) or using a keyboard and mouse connected to the device.
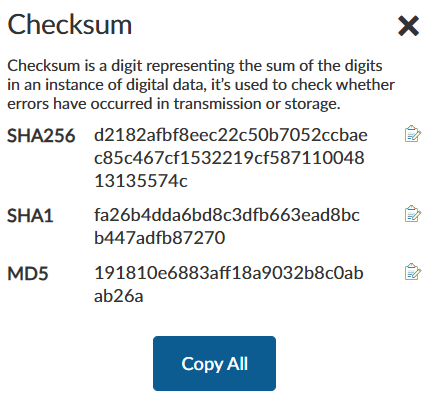
You can use PowerShell, HashCheck, or built-in Linux commands to verify the checksum.
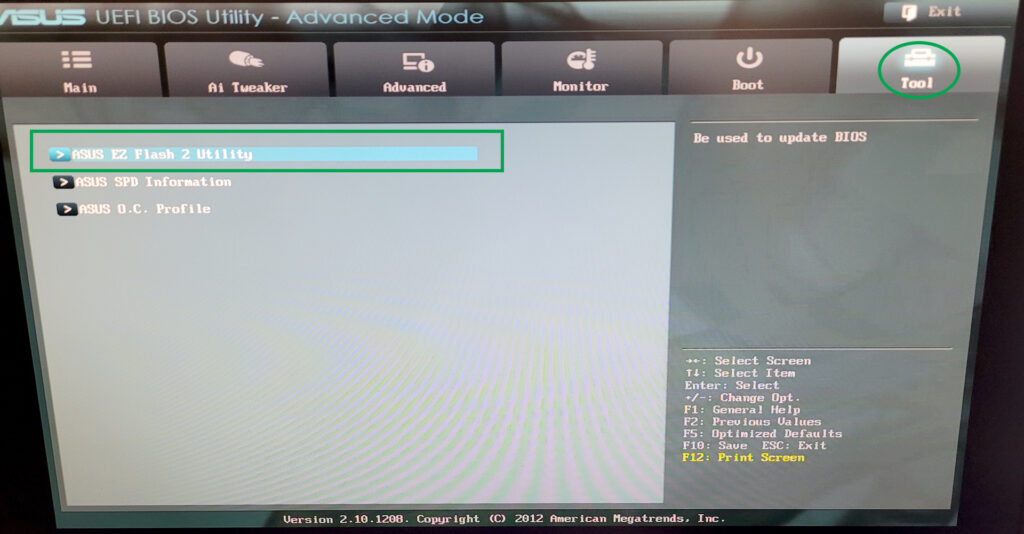
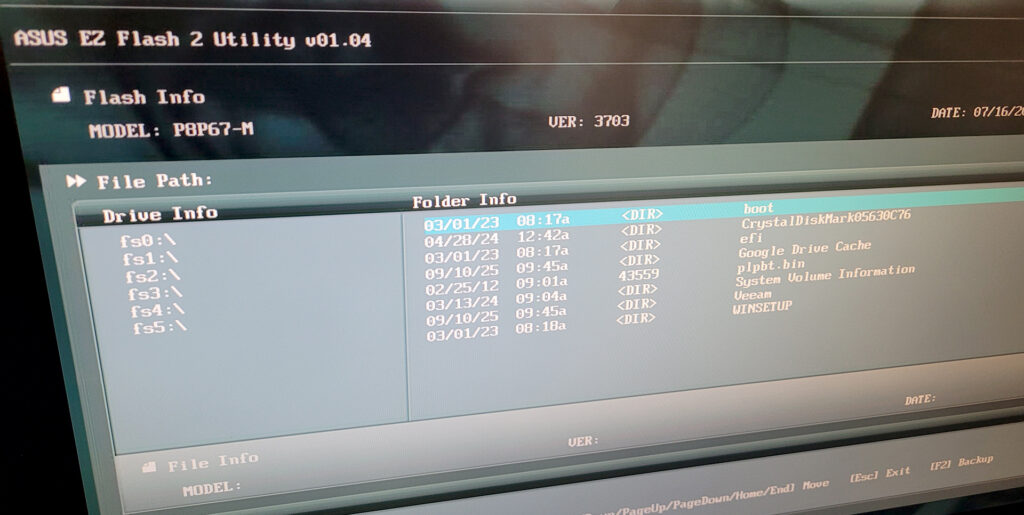
4. Perform the Upgrade/Update – If you are unable to update the BIOS within an OS (Windows, Linux, MacOS, etc), consider selecting an optional method, for example, downloading just the BIN, IMG or ROM file onto a flash drive, booting into your UEFI/BIOS or Firmware update screen, inserting the flash drive and letting the utility use the file for the upgrade. In the example below, I booted into the UEFI BIOS Utility in an ASUS P8P64-M Motherboard, selected the Tool tab, and ran the ASUS EZ FLASH 2 Utility.
The Utility finds the files on the media I chose (USB Flash Drive), I then select the file to perform the update. The Utility will then verify the integrity of the file as well as compatibility and version, and then proceeds to perform the update.
And away we go…

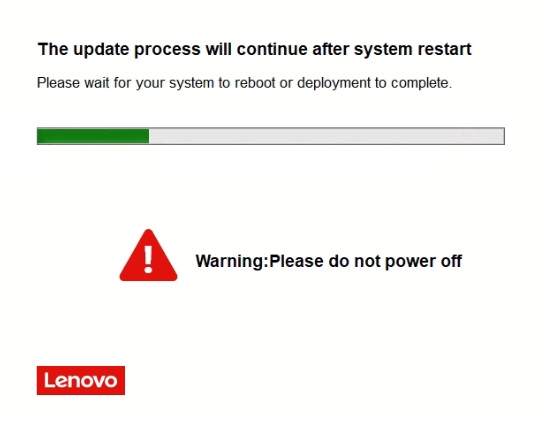
5. Wait for the process to complete and verify the upgrade – Your device or PC may restart a few times, or ask you to restart manually. On other devices such as printers, it may ask you to power cycle the device. If things are not going as planned (black/blank screen or device just turns off) make sure to review the instructions to see what the next steps are. Once the device has restarted, compare the BIOS information to what you had noted down before, and verify that the update did in fact take place…but you are not done. Check ALL functionality on the device which can be battery charging, printing, scanning, network access, plugging/unplugging devices, etc.
Tips and Tricks
The following list I have accumulated after 20 years of updating the UEFI, BIOS, Firmware and other software on thousands of devices from Tablets to complex Plotters/Printers.
- BIOS Defaults / Optimized Defaults / Fail-Safe Defaults / Setup Defaults – About 15 years ago I had built a custom PC for a client and it was returned to me with a problem. The only option was to update the BIOS, which I did. After the successful update, I would go in the BIOS, make a change, save it, restart, but the changed setting was not saved. I contacted the Motherboard’s manufacturer (ASUS, MSI or ASRock – can’t remember) and let them know I had performed multiple CMOS/BIOS Resets using the pin, drained it of power, removed the CMOS battery, etc, and the problem persisted. In their reply, I read something that froze me for a few minutes, because it was something I wish I had known a long time ago. They stated that the solution was to load one of the Default Options in the BIOS. They explained that these settings perform some operations in the background that are not available to the user in the BIOS options. Sure enough, I loaded the Optimized Defaults, restarted the computer, applied my new settings and this time they were saved. I have since then loaded up BIOS defaults when troubleshooting very weird problems and the tip has fixed several problems.
- Factory Default / Reset to Factory / Default Settings – I have confirmed on multiple devices (Examples: VoIP phones, IP Cameras and Corporate Firewalls) that a factory reset after a Firmware update is actually a best practice. Amcrest for example, recommends applying defaults settings to their IP and Analog cameras after a firmware upgrade. In several situations, I have had IP Phones retain some settings after an upgrade, only to be fixed by factory resetting the phone.
Finally, in some forums, better performance by some Firewalls was confirmed by performing upgrades in the following sequence: 1) Export Settings 2) Upgrade Firewall 3) Factory reset 4) Re-Import settings - Something is “off” – If you feel that after performing an upgrade something is off, proceed to perform a restore of Defaults or factory reset, and then perform the same upgrade again. In some cases the application or tool will let you know that you are attempting to flash with the same version – it is safe to proceed.
- Risky Updates/Upgrades – You will find yourself in situations where a UEFI, BIOS or Firmware upgrade is risky due to a system that is randomly restarting, powering off or locking up. In this case, try to study the pattern of the device and remove as much hardware from it as possible (Memory from motherboards, disable connections on printers, unplug unnecessary cables, etc.) – Try to get the device as stable as possible so it does not restart or lock up during the upgrade.
- Don’t give up – If you ruin a Motherboard or a device, please don’t give up. In my old LeThe Online forum, I was impressed by all the BIOS and device recovery stories. Some users went to great lengths to recover a BIOS, reaching deep levels of tech support, finding files, applications, methods, creating their own USB recovery dongles, and even contacting electronics repair centers that were able to switch out chips. Worst case, contact me, tell me your story, and I will try to help you ✌🏻